 Skip to content
Understanding the Factors That Influence Vinyl Siding Installation Quality Standards

Getting new siding on your home is a significant investment. But here is something many homeowners do not realise until it is too late: the quality of the product you choose matters far less than the quality of the installation behind it.
Two homes can receive the exact same brand of vinyl siding. One can last forty years with no issues. The other can begin buckling, cracking, and allowing moisture infiltration within a few years. The difference almost always comes down to whether vinyl siding installation quality standards were followed from start to finish.
This guide breaks down exactly what those standards involve, what proper Vinyl siding installation criteria looks like step by step, and what Connecticut homeowners should know before any contractor picks up a panel.
Why Installation Standards Matter More Than Most Homeowners Realise
Vinyl siding is designed to perform in specific conditions. It expands and contracts with temperature. It sheds water in a precise sequence from panel to panel. It relies on the wall assembly behind it being properly prepared before a single piece goes on.
When vinyl siding installation quality standards are skipped or rushed, the consequences include:
- Panels that buckle in summer heat because they were fastened too tightly
- Water infiltration behind the wall because housewrap was installed incorrectly
- Cracking in cold temperatures because panels were installed too rigidly
- Mold and rot in the wall cavity because moisture barriers were missing or lapped incorrectly
- Panels that pull loose in high winds because fastening did not meet requirements
None of these failures are a product problem. They are installation problems. Understanding what vinyl siding installation criteria require helps you hold any contractor accountable before, during, and after the project.
Factor One: Wall Preparation and Inspection
The most important phase of any vinyl siding installation happens before a single panel goes on the wall.
Removal of Existing Siding
Proper vinyl siding installation always begins with complete removal of the existing cladding. Installing new vinyl over old siding is a common shortcut that creates hidden problems. It traps old moisture, prevents proper wall inspection, and can cause the new installation to sit unevenly or fail to integrate correctly with trim, windows, and corners.
Wall Structure Inspection
Once the old siding is off, every square foot of wall sheathing must be inspected. Soft spots, discoloured areas, and sections showing any signs of rot or mold must be replaced before anything new goes on. This step is non-negotiable in a quality installation.
Hidden structural damage that is covered by new siding will continue to deteriorate beneath it, often progressing significantly before it becomes visible again.
Surface Levelling
Any areas of the wall that are uneven, warped, or out of plane must be addressed. Vinyl siding fastened to an uneven wall will reflect those irregularities on the finished surface and may not drain correctly.
Factor Two: Housewrap and Moisture Barrier Installation
After the wall is inspected and any damage is repaired, a moisture barrier or housewrap must be installed before the siding goes on.
This layer does two things. It keeps bulk water out of the wall assembly while allowing water vapour to escape. Both functions matter.
Key vinyl siding installation quality standards for housewrap include:
- Lapping each horizontal course over the one below, never under it, so water runs off rather than into the wall
- Sealing all seams with approved tape
- Cutting carefully and accurately around window and door openings
- Ensuring the housewrap integrates correctly with window and door flashing before any panels go on
This is one of the most commonly rushed phases in lower-quality installations. It is also one of the most consequential. A poorly installed moisture barrier can allow water to work into the wall cavity across the entire surface of the home.
Factor Three: Flashing at Critical Junctions
Flashing is the waterproofing detail installed at every point where siding meets another element: windows, doors, roof installation companies, electrical penetrations, hose bibs, and corners.
These junctions are the most common entry points for water on any exterior wall. Vinyl siding fastening requirements and installation standards both specify how flashing must be installed at each of these locations.
Window and Door Flashing
Flashing must be installed in the correct sequence around every opening. The sill flashing goes in first, then the sides, then the head flashing at the top. This creates a shingled waterproofing detail that sheds water outward at each step.
Reversed flashing, where a step is installed in the wrong sequence, creates a water trap rather than a water shed. This is a common error in lower-quality work.
Roofline Integration
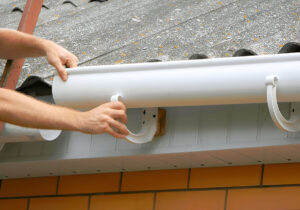
Where siding meets a roofline, step flashing and a properly installed drip edge ensure water moves away from the wall and into the gutter system. Proper integration with gutter installation services at this point matters enormously. A proper gutter installation system that connects correctly with the siding and roofline flashing creates a fully coordinated water management system for the home.
Factor Four: Correct Fastening Technique
This is one of the most specific and most frequently misunderstood aspects of vinyl siding installation quality standards.
Vinyl siding is not fastened tightly to the wall. It is hung loosely, in a way that allows each panel to move slightly as temperatures change. Vinyl expands in heat and contracts in cold. A panel that cannot move will buckle in summer and crack under stress in winter.
The Nail Slot Rule
Every vinyl panel has a nail slot at the top, typically an elongated oval rather than a round hole. The fastener goes through the centre of that slot, not at the edges.
If a fastener is driven through the edge of the slot or at an angle, the panel cannot move when it needs to. Vinyl siding fastening requirements specify centre-slot fastening for every panel on every course.
Fastener Spacing
Fasteners should be spaced at intervals specified by the manufacturer, typically every sixteen inches along studs. Missing a stud or spacing fasteners too far apart reduces the wind resistance of the installation and can allow panels to flex and eventually pull free.
Fastener Depth
Fasteners should not be driven tight against the panel face. A small gap of approximately one thirty-second of an inch between the fastener head and the siding face is the standard. This gap allows the panel to slide on the fastener as temperatures change.
These requirements sound precise because they are. A vinyl siding installation checklist from any reputable manufacturer will specify all three of these fastening details explicitly.
Factor Five: Panel Overlap and Locking
Each horizontal course of vinyl siding locks into the one below it. The bottom edge of the upper panel hooks over a locking channel on the upper edge of the lower panel. This locking connection keeps panels aligned, prevents wind uplift, and creates the water-shedding profile the siding system depends on.
Exterior siding installation tips from industry bodies and manufacturers consistently emphasise the importance of full, consistent engagement of this locking channel across every course. A panel that is not fully locked:
- Is vulnerable to wind-driven rain getting behind it
- Can pull out of position under wind load
- Creates an irregular appearance on the finished wall
Checking that every panel is fully locked and that the locking channel runs consistently across the full width of the wall is part of any quality inspection during installation.
Factor Six: Corner, Trim, and Accessory Installation
The finishing details around corners, windows, doors, and rooflines define the quality of the completed installation from both a performance and appearance standpoint.
Corner Posts
Corner posts must be installed plumb and level from top to bottom. A corner post that is even slightly out of plumb will cause every panel in that run to track off course as the installation progresses up the wall.
J-Channel and Trim
J-channel is the trim piece that frames window and door openings. It must be cut cleanly, seated correctly, and integrated with the flashing beneath it. Gaps, poorly mitered corners, or J-channel that does not connect properly with the window frame creates water infiltration points directly at the most vulnerable junctions on the wall.
Starter Strip
The starter strip at the base of the wall sets the angle for every panel above it. If it is not level, the entire wall installation will drift. Checking the starter strip for level before the first panel goes on is a basic quality step that separates careful installation from rushed work.
How Siding Quality Connects to Your Full Exterior System
Vinyl siding installation quality standards are not just about the siding itself. The siding performs as part of a larger exterior system that includes roofing, windows, and gutters.
A quality vinyl siding contractor understands how these systems interact and accounts for them during installation:
- Roofing services address the layer that protects the wall above the siding. If roofing flashing is failing, water can enter above the siding and work down behind it regardless of how well the siding is installed
- Window installation services that properly flash and seal each opening prevent the most common moisture entry points on any exterior wall
- Gutter installation services ensure water that runs off the roof is directed away from the home cleanly rather than running down the face of the siding
- Home renovation services that address the full exterior together produce results that are coordinated, sequenced correctly, and covered under unified warranty terms
Addressing vinyl siding in isolation without evaluating the surrounding systems is one of the most common reasons siding problems develop even after a recent installation.
What to Look for in a Vinyl Siding Contractor in Connecticut
Choosing the right vinyl siding contractor for your Shelton, Connecticut home is as important as understanding the standards themselves. Here is what a quality contractor will do:
- Provide a detailed written estimate before work begins that specifies materials, process, and warranty terms
- Remove existing siding completely before starting
- Inspect and repair the wall structure before housewrap goes on
- Install flashing correctly at every opening and junction
- Follow all manufacturer fastening specifications precisely
- Offer a labour warranty alongside the product warranty
- Be licensed and fully insured in Connecticut
- Have a strong local reputation with verifiable references
A contractor who shortchanges preparation, skips the wall inspection, or dismisses questions about fastening technique and flashing detail is not meeting vinyl siding installation criteria regardless of what they claim.
Why Homeowners in Shelton Trust Creative Home Improvement LLC
Creative Home Improvement LLC has served Connecticut homeowners since 1974. More than fifty years of experience in vinyl siding installation, roofing services in CT, window installation services, gutter installation services, and full exterior home renovation services means the team understands every element of a quality exterior project.
Every siding project begins with complete removal and a thorough wall inspection. Housewrap, flashing, fastening, and finishing are all performed to manufacturer specification and industry standard. Every project is backed by lifetime warranties on product and labor.
For homeowners in Shelton, Fairfield County, New Haven County, and The Valley looking for a vinyl siding contractor who treats vinyl siding installation quality standards as the baseline rather than a selling point, Creative Home Improvement LLC delivers exactly that.
Conclusion
Vinyl siding installation quality standards cover every phase of the project: wall preparation, moisture barrier installation, flashing, fastening technique, panel locking, and trim finishing. Each phase builds on the one before it. Skipping or rushing any of them creates vulnerability that eventually shows up as buckling, water damage, or structural deterioration behind the wall.
Understanding vinyl siding installation criteria puts you in a position to evaluate any contractor properly and ask the right questions before work begins. The best siding job is one where every standard is met from the first inspection to the final piece of trim.
For Connecticut homeowners ready to invest in a quality exterior, Creative Home Improvement LLC has been the trusted name in Shelton for over fifty years.
Table of Contents
Latest Posts



Contact us
FAQs
Can vinyl siding be installed over existing siding?
It is possible but not recommended for quality installations. Removing old siding allows wall inspection and proper housewrap installation, both of which are critical to long-term performance.
How tight should vinyl siding panels be fastened?
Not tight. Panels must be able to slide slightly on their fasteners to accommodate thermal expansion. Fasteners through the centre of the nail slot with a small gap at the fastener head is the correct standard.
How long does a quality vinyl siding installation take?
Most residential projects are completed within three to five days depending on the size of the home and any wall repairs identified during inspection.
What is the most common mistake in vinyl siding installation?
Over-fastening panels so they cannot expand and contract with temperature changes. This is the leading cause of buckling in summer and cracking in cold weather.
Does Creative Home Improvement LLC handle roofing and gutters alongside siding?
Yes. The team provides roofing services, gutter installation services, and window installation services alongside vinyl siding installation, making full exterior coordination possible through a single contractor.